Getting started with priPrinter
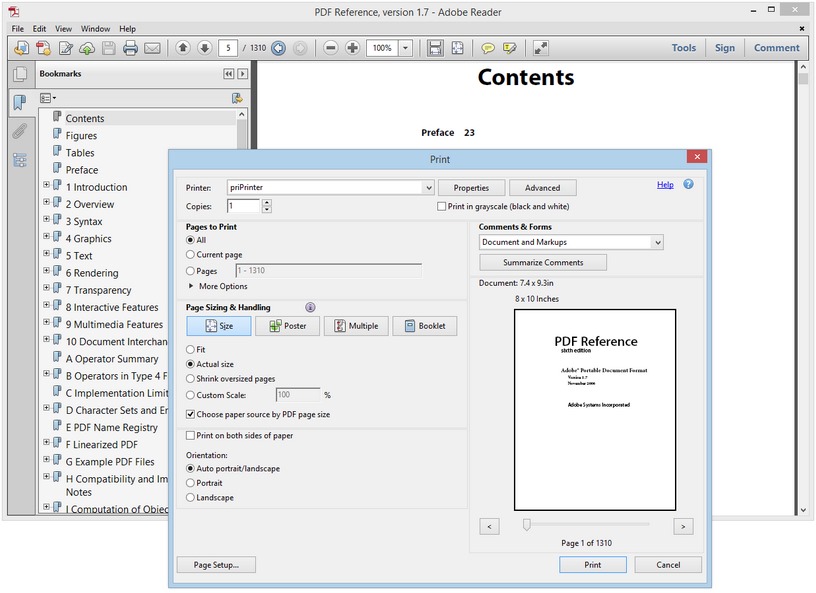
1 Let’s print from any application to priPrinter. In this tutorial we are printing from Adobe Acrobat Reader.

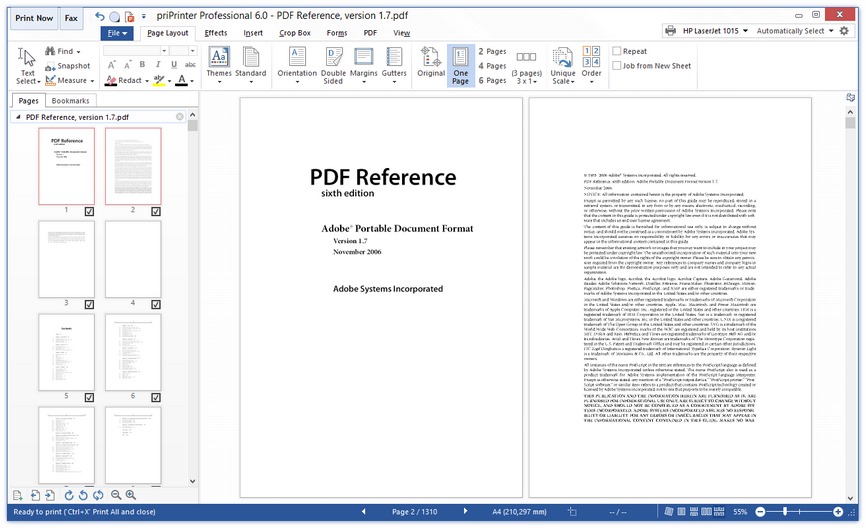
2 After few seconds we are in priPrinter.

Source pages are on the left. Destination printer is set to use A4 pages – see bottom of screenshot. If you want to change paper size click on paper size area in status bar or use printer setting – click on Gear icon on right top of priPrinter window.
3 Now if you want to print it as booklet simple select booklet mode:

4 Ok, we are in Booklet mode. If you want to change size of gutters click on them and drag. Or use Page setup dialog and type exact values. In order to open that dialog Right click on page and select this menu item. Booklet specific options can be changed Booklet context tab.

5 Contents of pages are small because of huge empty borders. Let’s switch to Crop tab and click Auto Trim. Empty borders will be removed automatically.

If something was detected not fully right, you are free to drag borders and adjust crop area.
NoteWhen Crop Tab is selected pages are displayed uncropped.
6 After that select page layout tab again, empty margins will be removed.

If gutters are not visible click on Gutters button and switch them ON.
7 Now you may print by clicking Print Now button.

8 If you want to add page numbers, simple select Insert tab and click Page Number. Page numbers will appear:

You may click on them and drag across page and choose right position. Double click on any page number in order to change font, size or style.
That’s it.
In case of Booklet you may try 3D mode, just click 3d view button. This 3D mode is especially helpful for booklets or double sided mode. It shows how final results will look like.

If you don’t want to print booklet just skip booklet related items. In order to go back select “Standard” mode.